
News:
The Web Workgroup Page for this class is online Now!
The Caricature Lesson is online. Click here!
Check out the Student Galleries!
Click here to find the latest lesson tools for class.

Click to see Class Syllabus and Schedule

PhotoShop Bootcamp - Clarke College
Basic Skill Level |
Mid-Level Skills |
Advanced Skill Level |
| Student has basic computer skills and is comfortable with the mouse interface to be able to render and retouch simple images in the application. | Student has experience scanning images into a computer, and can manipulate, resize, retouch images in PhotoShop. Has understanding of resolution for print applications. Can use mouse as a drawing and painting instrument. Knows most everyday graphic file formats and their applications. | Student
has ability to digitize analog images, optimize resolution for print or multimedia, can
retouch, combine and recolor images. Is facile with mouse or pressure sensitive tablet to
create original images.
|
| Is this class for me? Past classes have invited students with limited computer experience and absolutely no experience with PhotoShop or any image editing program whatsoever. And we've had students with advanced skill levels. The class is small and structured in a way that provides basic instructional opportunity for amateurs while providing advanced students with new challenges, productivity tips, and exciting discoveries about PhotoShop that can only come from mentoring from a true PhotoShop and graphic design professional. The instructor promises advanced students this: Every class you will learn something you've never known before about PhotoShop that will likely change the way your work and enhance your talents and abilities. | ||
 Technical
Platform: At Clarke College we have a Macintosh Lab
equipped with networked iMacs with 300+ megahertz processors and
Iomega Zip drives (each student is required to bring his/her own Zip cartridge
on which to save one's work). We also have a projectable system for class
demonstrations.
Technical
Platform: At Clarke College we have a Macintosh Lab
equipped with networked iMacs with 300+ megahertz processors and
Iomega Zip drives (each student is required to bring his/her own Zip cartridge
on which to save one's work). We also have a projectable system for class
demonstrations.
Though one can develop excellent technique using a simple mouse with Adobe PhotoShop, the real power of PhotoShop is best leveraged using a stylus and pressure sensitive tablet. The Wacom Graphire is among the better tablets the instructor recommends. if you are s serious user, a Graphire is a must and is less than $100.
 Adobe
PhotoShop's tools (the brush) airbrush and eraser) have been programmed
to respond to the pressure sensitive tablet This enables the user
to attain not only precise control, but a much more natural feel for spontaneous
drawing and painting. Though the instructor doesn't require students
in this course to purchase a tablet, if you are serious about PhotoShop,
and believe it will become an important part of your career, a tablet
would be an excellent investment (you can avail yourself of a significant
student discount... check with campus technology resources or check Wacom.com,
the leading manufacturer of pressure sensitive tablets for use with PhotoShop).
Pressure sensitive tablets are made for either Mac's and PCs. Gary
will be demonstrating the Wacom GraphireTablet from time to time during
class. It's a duo platform USB tablet that works with both Mac and PC
computer platforms. If you're interested in learning more about pressure
sensitive tablets, talk to your instructor.
Adobe
PhotoShop's tools (the brush) airbrush and eraser) have been programmed
to respond to the pressure sensitive tablet This enables the user
to attain not only precise control, but a much more natural feel for spontaneous
drawing and painting. Though the instructor doesn't require students
in this course to purchase a tablet, if you are serious about PhotoShop,
and believe it will become an important part of your career, a tablet
would be an excellent investment (you can avail yourself of a significant
student discount... check with campus technology resources or check Wacom.com,
the leading manufacturer of pressure sensitive tablets for use with PhotoShop).
Pressure sensitive tablets are made for either Mac's and PCs. Gary
will be demonstrating the Wacom GraphireTablet from time to time during
class. It's a duo platform USB tablet that works with both Mac and PC
computer platforms. If you're interested in learning more about pressure
sensitive tablets, talk to your instructor. 
At issue in the Macintosh Labs is that all of the iMac computers use USB ports rather than standard serial device connections. This is terrific if your personal computer is also equipped with a USB port. Then you could carry your tablet with you and plug it in wherever you happen to be.
Student Qualifications: This is a basic-level to mid-level skills course for students with little or no previous experience with PhotoShop 5. However, even those with mid-level mastery of PhotoShop basics could benefit from taking this course. Because PhotoShop has broad applications and a vast tool set, users often become specialized around a specific and limited set of capabilities. Even experienced users often feel they are not using the program to its fullest potential. Furthermore, many users do not fully comprehend the complex application of such issues as pixel resolution and how it applies to commercial printing. Those who use PhotoShop as a Web design tool need more experience learning how to maximize print quality. Those who use PhotoShop for printing, tend to be insecure in Web applications and leveraging color palette reduction and file compression options to improve Web site performance. Then there are those users who wish to use PhotoShop for the myriad of multimedia applications, CD-ROM interactive media, digital video editing, etc., all of which have their own image format considerations. Consequently, all of these students will likely benefit from this course.
Course Logistics: This course is based on a hands-on workshop learning model. Student assignments as well as class lessons can be executed on the Library's Mac Lab or on Communication Department Lab Computers which have PhotoShop 5 onboard.
Student Materials: Though it is not absolutely necessary, it is advisable students own a personal copy of PhotoShop 5, and a personal computer on which to run it. Undoubtedly, there will be the need to complete class assignments on one’s own, and a lab computer might not be convenient or available on demand. The software is available to students at a significant discount in the Clarke Bookstore.
Course Objectives: This course is designed to provide students with a functional knowledge of how to use PhotoShop 5 to edit digital media and learn how PhotoShop is used in design and production phases in publishing, Web design and multimedia applications.
Student Requirements: The student is required to complete the 5 assignments which include:
- The Color Photograph: Scan, Retouch, Color balance and Optimize the Resolution for Target Application
- The Web Banner: Combine and Compose Imagery and Optimize for Efficient Web Deployment
- An Original Image (Poster): This assignment serves to provide experience in working with PhotoShop’s array of image manipulation filters.
- The Halftone: Scan, optimize and convert an image to Grayscale and then to a Halftone Bitmap.
- Layered Illustration with Background Texture and Compositional Elements Gathered or Created by the Student
VI. Learning Objectives: Students who successfully complete this course will know the following skills, techniques and tools that apply to PhotoShop 5
A. Getting images into PhotoShop B. Working with Resolutions C. Anti-aliasing: Understanding
and utilizing one of PhotoShop’s most powerful features which interpolates
contrasting pixel colors to render smoother gradations in color and better rendering of
type elements. This feature contributes to more pleasing results when re-sizing graphics
and changing resolution.
D. Choosing the most appropriate graphic file format for your project and how these formats relate to platform dependence, color management, color depth and file size
- PICT: Picture format that supports grayscale and anti-alias full-color imaging
- EPS: Originally developed by Adobe Systems, it stands for Encapsulated PostScript. CMYK color formatting which contains both high-resolution imaging data and a low-resolution image for placement in page layout software such as Quark Xpress, PageMaker, FreeHand, Illustrator, Corel, et. al. The Eps file must accompany the page layout document wherever it goes so the raster image processor or print imaging system renders the high-resolution data.
- TIFF: Tag Image File Format. Featuring virtually the same image and color management characteristics as an EPS, this format was developed by Aldus Corporation (now Adobe), to allow smaller, more manageable page layout file sizes once high resolutions images are placed in the document. As with EPS, these files must accompany the page layout document. The printer/image processor gets its high-resolution data from the Tiff image, not the page layout. Some applications allow you to imbed the image files into their documents thereby relieving you of managing multiple files.
- JPEG: Stands for Joint Photographers’ Engineering Group, a consortium of companies involved in computer imaging software and hardware development. JPEG is a file compression scheme that allows smaller file sizes while maintaining full-color bit depth. JPEGs display using your computer’s full-color reproduction capabilities and system palette.
- Gif: Developed by CompuServe, one of the early adopters of graphical interfaces developed for on-line communication. This format uses a palette limiting compression scheme which simply reduces the number of colors required to render a graphic. Because GIFs don’t utilized antialiasing, color gradations are re-rendered using a dithering scheme of image pixels.
- BMP: A Microsoft image format utilizing RGB color palette. Because Microsoft focuses on the business productivity marketplace, which outputs to color output devices such as inkjet and laser printers, Microsoft determined there was no need to confuse users with CMYK color management tools found in professional graphic software packages. BMP images are automatically converted into CMYK when you print a Microsoft document. The conversion occurs in the background and utilizes device data in a process invisible to the user.
E. Identifying and Working with Color Palettes
- Mac Palette
- PC Palette
F. The PhotoShop 5 Tools
- Marquis Box
- Marquis Ellipse
- Lasso
- Magic Wand
- Cropping Tool
- Type Tool
- Hand
- Zoom Tool
- Paint Bucket
- Graduated Fill Tool
- Line Tool
- Eye Drop Sampler
- Pencil
- Paint Brush
- History Brush
- Airbrush
- Smudge Tool
- Stamp Pad Tool
- Path Tool
- Dodge (and Sponge) Tool
- Measure Tool
G. Working with Foreground and Background Color
H. Editing Modes
- Standard
- Mask
I. Working with Layers
J. Working with Paths
K. Working with Channels
L. Type Manipulation in Adobe PhotoShop 5
- Creating Type Layers
- Applying Layer Effects
- When it’s appropriate to render the type layer
- Personal Tips and Tricks (including using type exported from FreeHand)
M. Layer Effects
- Emboss (outer and inner)
- Drop Shadow
- Inner Shadow
- Outer Glow
- Inner Glow
N. Image Editing
- Cutting
- Copying
- Copy Merged
- Paste
- Paste Into
- Clear
- Fill
- Stroke
- Free Transform
- Transform
O. Image Manipulation
- Modes
- Bitmap
- Grayscale
- Duotone
- Index Color
- RGB
- CMYK
- Lab Color
- Multichannel
2. Adjusting an Image
- Levels
- Auto-levels
- Curves
- Color Balance
- Brightness and Contrast
- Hue, Saturation and Lightness
- Desaturation
- Replace Color
- Selective Color
- Channel Mixer
- Invert
- Equalize
- Threshold
- Posterize
- Variations
3. Duplicate
4. Apply Image
5. Calculations
6. Image Size
7. Canvas Size
8. Crop
9. Rotate Canvas
10. Histogram
11. Trap
P. Layer Manipulation
- New
- Duplicate Layer
- Delete Layer
- Layer Options
- Adjustment Options
- Effects
- Type
- Add Layer Mask
- Enable Layer Mask
- Group with Previous
- Ungroup
- Arrange
- Align Linked
- Distribute Linked
- Merge Layers
- Merge Visible
- Flatten Image
- Matting
Q. The Select Menu
- All
- Deselect
- Reselect
- Color Range
- Feather
- Modify
- Grow
- Similar
- Transform Selection
- Load Selection
- Save Selection
R. The Filter Menu
- Artistic
- Blur
- Brush Strokes
- Distort
- Noise
- Pixelate
- Render
- Sharpen
- Sketch
- Stylize
- Texture
- Video
- Other
S. The View Menu
- New View
- Preview
- Gamut Warning
- Zoom in
- Zoom out
- Fit on Screen
- Actual Pixels
- Print Size
- Show/Hide Edges
- Show/Hide Path
- Show/Hide Rulers
- Guides
- Snap-to Guides
- Lock Guides
- Clear Guides
- Grid
- Snap-to Grid
T. Windows and Palettes
- Cascade
- Tile
- Arrange Icons
- Tools
- Navigator
- Info
- Options
- Color
- Swatches
- Brushes
- Layers
- Channels
- Paths
- History
- Actions
- Status Bar
Course Syllabus for PhotoShop 5 Boot Camp
The course is held over an 8-week schedule. There are two classes per week.
Class 1
Objective: Convey to students what the instructor’s expectations are to successfully complete this course.
- Introductions among Classmembers
- Distribute Course Syllabus and Explain Course Requirements, Materials and all Pertinent Information Students will need to Successfully Participate in this Course
- Premier and Describe the Official Course Web Site, and explain how students will use it in conjunction with class activities
- Portfolio Review of Instructor’s Works which represent the varied projects assigned to students
- Assignment: Bring a photograph to the next class for scanning
Introductory Assignment:
Please copy an image supplied by the instructor to your hard drive for our introduction to
basic PhotoShop tools.
 Introductory
Assignment Instructions:
Introductory
Assignment Instructions:
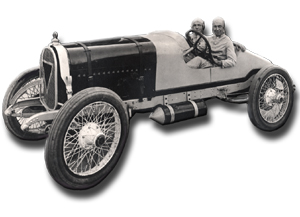
Download the Introductory Assignment Image of the two men in a vintage car.
Please copy an image supplied by the instructor to your hard drive for our
introduction to basic PhotoShop tools.
This assignment is all about getting comfortable with the basic tools in PhotoShop which
allow you to manipulate and retouch photographs. In this assignment, you will create a
mask image of an object which will enable you to remove the background of the photo..
In this first assignment we will use the following tools, working on this image right
along with the instructor.
In this first assignment we will use the following tools, working on this image right along with the instructor.
- Retouching tools
- Masking Tools
- Clipping Paths
- Image contrast and color tools
- Working with Layers and Layer Properties such as transparency and opacity
Special Notice: Save your practice file that you downloaded to your disk. We will be revisiting this for class lectures and demonstrations.
Class 2:
Assignment: Creating the Photographic Postcard
Objective: The student learns the following steps in the process
of digitizing an image which include The Scan, Color Balancing, Retouching, and Optimizing
Resolution for Target Application Requirements: Students must have two or more photographs they
wish to scan and manipulate and a portable disk on which to store the file. Elements of
both photographs will be combined into one photograph. Special Notice: In the previous class we didn't get a chance
to talk about masking or clipping tools. We will endeavor to cover these capabilities of
PhotoShop in this or the next class. Class 3 The Photograph (continued) Objective: Supervise students’ progress on their
photographs and provide individualized guidance and remedial help for those in need. In
this session we are going to learn how PhotoShop’s anti-aliasing feature works to
improve image quality.
Class 4: Working in Layers and Combining Image Elements from Different Sources
Objective: In this class we begin by scanning our second image
so we can combines elements of both image sources to create a single compelling image.
Extensive use of PhotoShop’s layering is covered in this class.
Click
here to retrieve pieces for a lesson which will help you
learn the principles of this portion of the class. Download the pieces
to your hard drive on your workstation.
Class 5: Working with Type Elements in PhotoShop 5
Objective: The student learn to use type elements in layers, and
the tools used to manipulate those type elements including the following effects: Outer Bevel
Inner Bevel
Pillow EmbossRequirement in this Class: Students
will add type element to their composition and an appropriate effect that will contribute
to the effectiveness of the image. This will complete the first class project. See
the Gallery to view the students' Postcard
Design Project!
Class 6: Choosing the Correct File Format for your Image
Objective: In this pivotal class, students will learn the most
appropriate file format for their image file and understand the correlation of resolution
to file format. Also, we will discuss the cross platform implications of certain file
formats and their appropriateness for one operating system over another. Expectations: Students will save their image in two different
formats for the following target application: high-resolution printing and the Web.
Class 7: Working With Color in PhotoShop 5
Objective: Students will understand the different characteristics of color in PhotoShop 5.
- Identifying and Working with System Specific Color Palettes
- Mac Palette
- PC Palette
- RGB and CMYK Color
- Indexed Color (reducing colors for smaller file sizes)
- Dithering
- Grayscale
- Duotone
- Bitmap
Assignment: The Web Banner: Students will be required to create a photographic or rendered image through a combination and composition of imagery. They then must optimize the result for the most efficient Web deployment.
Requirements: Students must bring image elements to class, either found or created, that can be combined to create an advertisement for the Web. The theme is provided by the instructor.
Class 8: The Web Banner Project (continued)
Objective: Students must make some progress on their individual assignments and present them for review by the instructor and fellow classmates. This will be a lab day in which the assignment can be advanced during class time.
Class 9: Working with Filters in PhotoShop 5
Objective: Students will learn the practicalities and applications of PhotoShop’s filters, among them:
- Artistic Filters
- Rendering Filters including
- Render Clouds
- Render Lighting Effects
- Render Lens Flare
- Sketch Filters
- Stylize Filters
- Texture Filters
Assignment: An Original Image (Poster): This assignment serves to provide experience in working with PhotoShop’s array of image manipulation filters.
Requirement: Students must bring imagery that can be used in a original composition. It can contain photographic, drawn or painted images. The design objective is to create a poster, so have a theme ready for class or the instructor will provide one.
Class 10: Review the Poster Project
Review: Students will present their posters (both electronic and hard copy) and describe their techniques for achieving their results.
Lesson and Objectives: We will cover the art of grayscale and bitmap image creation using PhotoShop 5. Students will learn how to:
- Scan a black-and-white image and/or color image for grayscale manipulation
- Optimizing the grayscale image through the use of contrast and brightness controls.
- Sizing and cropping the image
- Manipulating the sharpness of the image through the use of sharpen and blur filters
- Using PhotoShop’s layers feature to change depth of field or to add emphasis and drama to an image.
- Duo-tone, tri-tone and quad-tone options
- Stochastic screening a black-and-white image (bitmap conversion using dithered halftone feature), re-importing the image into a layered RGB file, changing layer from normal to multiply, and colorizing a layer underneath the image layer
- Choosing the best file format for its target application, including TIF, GIF, and EPS.
Assignment: The Black and White Image (halftone): Scan, optimize and convert an image to Grayscale and then to a Bitmap image.
Student Requirement: Students must have an appropriate image with which to work. Students will scan the images in class, manipulate them according to the lesson and choose the best file format with which to save the image on disk.
Class 11: The Black and White Halftone Assignment Continued
Objective: This is a lab class in which students can use lab equipment to further manipulate their image. Supervision by the instructor will determine areas of opportunity or remedial help. There may be a further detailed lesson in this class depending on opportunities discovered among the students as they seek to meet their individual objectives.
Lesson: Determined by students’ progress on the assignment
Student Requirement: Students must be prepared to present final image for evaluation.
Class 12: Preparing for the Final Assignment
Objective: Students will begin working on their Final Assignment which is a complex, layered composition which will utilize several of PhotoShop’s effects filters.
See Memories of a Lifetime for samples which illustrate the basic concept of this assignment.
Lesson:
- Collecting objects and images found and created for our layered composition.
- Scanning 3D objects using a conventional scanner
- Using digital photography
- Creating a background texture
- Using drop shadows and embossing filters on objectives to enhance their appearance and create dramatic effects
- Using lighting techniques with the Render Command
- Using Lens Flare
- Using levels of transparency to create depth
Assignment: The Layered Illustration with Background Texture and Compositional Elements Gathered or Created by the Student. The student must plan, collect and execute a layered composition using a background texture, photographic elements, 3D objects), and possibly some uniquely created elements, either drawn or painted.
The Theme: This will be a personal, visual, biographic depiction of your entire life up to now. It must contain images and objects that symbolize important memories or milestones in your life. It can contain images of your parents, significant people in your life present and past, found objects such as buttons, badges, athletic equipment (baseball, perhaps), old shoes, a piece of sheet music, images from a movie that was important to you, the lyrics to a song, a photo of a pet, a childhood sketch, a favorite book. Use your imagination.
Class 13: Preparing your Composition
Objective: This is a hands-on opportunity in the lab to discover opportunities and determine remedial help among the students.
Lesson: The lesson for this class will be determined by the level of sophistication in the students’ works and their desire for more creative opportunities and variations.
Student Requirement: Students must make significant progress on his assignment during the class.
Class 14 Lab and Catch-up
Objective: Students must be prepared to show their work in either digital or hard copy form.
Class 15: Portfolio Review
Objective: Students will learn techniques of portfolio creation and maintenance from an expert, both traditional and Web-based. The
Lesson: The instructor provides insight into portfolio presentation, both traditional and Web-based.
Class 16: Lab and Catch-up
Objective: Students bring their portfolios to class for evaluation by the instructor
Lesson: An original video is planned for the class which features a local design studio with interviews of how these professionals use PhotoShop 5 to pursue their livelihoods.